Update #4 April 27, 2026
I’m now noticing more spots that have worn away since last year. I have been touching them up with UV nail polish. For mine, I use black, beige, and brown, then use the UV lamp on them. I also used some nail powder mixed with UV resin for a few of the areas. It seems to work, and if I do it right, I can’t see where the patches are.
Update #3 April 5, 2025
It’s been since early Covid that I did this countertop. Thank goodness that is over. It’s still holding up. I’ve had to do a few touch ups, but nothing major. I still use trivets and make sure not to sit anything hot on the countertop.
Update #2
It’s now been eleven months since I did this countertop. And it’s still holding up well. I definitely recommend this product. Just be sure to use trivets. And we’re still dealing with this crazy virus stuff. Who would have thought it in the beginning?
Update
It’s been seven months since I painted my countertop…and it still looks great. No nicks or scratches. It has lost some of its shine. If I polish it once in a while with car polish, it once again shines. I’d like to be able to clean it with something other than water and dish detergent though. Be sure to always use trivets under hot dishes and electric appliances, such as an Instant Pot or hot air fryer. Also use a cutting board when cutting vegetables, etc. I am glad that I did this project. It was worth the effort.
What is The Quiet Cruiser supposed to do when she cannot travel? Not an easy question when the nation is stuck at home in quarantine because of the Covid-19 virus. We were supposed to be packing to go to Disneyland for our anniversary. So, what else is there to do but a do it yourself project with Giani Countertop paint to get my mind off of all the craziness?
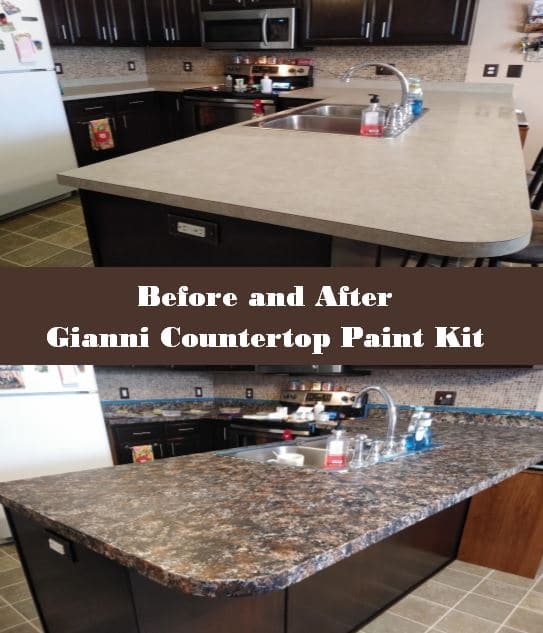
Giani Granite Company
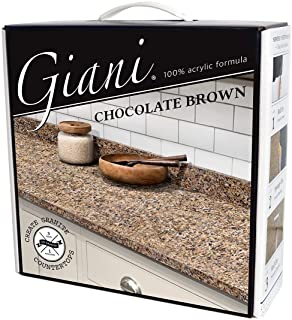
A couple of years ago I’d done a DIY project with Giani Stainless Steel paint when I did my dishwasher, which is still holding up well. I’d also re-stained our light brown kitchen cabinets a dark oak. Our countertop is 15 year old laminate, and showing it’s age with scratches and I’d already tried a burn mark repair with paint, so I decided repainting the entire countertop would be a good project for my at home time. Since Giani made such a good product with their stainless steel paint, I decided to reach out to them to see if they’d provide a countertop kit for me to try. And being the great company that they are, they quickly got back to me and said they’d be happy to help out. And within just a few days, I had my countertop paint kit in Chocolate Brown.

YouTube video
First thing that I did was to watch the Giani YouTube video on how to apply, and I’d suggest that you start there too. I also watched a few other videos to get an idea of what to do. There are plenty on YouTube.
The kit contents
The kit itself comes with most of what you’ll need to apply the paint. It comes with a can of primer, three cans of colored paint, numbered/lettered in the order that they should be applied, a can of high-gloss topcoat, a roller handle with two rollers, a foam brush, and a large sponge for application. I also used a disposable paint tray, a box cutter, a flat head screwdriver for scraping, 600 grit sandpaper, scouring pads, Scotch Blue painters tape, and clear caulk to seal the seams once I was done.
Day One
First step was clearing everything off of the countertop. This isn’t the easiest thing since I’ll still have to be cooking while working on this project, and you’re not supposed to put anything back on the countertop for three days for light things like a toaster, and a full two weeks for heavier appliances. I ended up putting the most used appliances such as the coffeepot and crockpot on the kitchen table, with the less used items on an old TV tray. We’d just have to make do for a while. I don’t want to mess this project up.
Get rid of the old caulk
After that the first thing that I did was to cut out the old caulk around the sink and in the seams between the countertop and backsplash with a box cutter. After scoring top and bottom with the blade, I scraped the caulk out with a flat head screwdriver. Do not skip this step, as the paint will not stick to the caulk and the finished product won’t look as good. Make sure that you also get the corners scraped and around the sink. Feel with your fingers to see if there is any residue left. After all that, clean up the entire area with rubbing alcohol to remove any residue that you cannot feel.

If you have any nicks or dents in your countertop, use wood filler to patch. Once that is dry, lightly sand it with 600 grit sandpaper so that it’s smooth. Wipe the area down with a damp cloth.
Be sure to clean the countertop well
After that step, I cleaned everything well with a scouring pad and then rinsed well with a wet cloth. I just kept the clean water in the sink and changed it as I needed to. Make sure that you’re getting everything clean and rinsing off all of the soap thoroughly. After that all dried, I used Frog Tape to mask off the edges where I didn’t want the paint to touch. That included masking off the edges of our stove that couldn’t be moved, and also the sink. Be sure to push down hard on the masking tape to get a good bond. You don’t want the paint seeping through. And use two layers of tape to make the strip wider. I then used the scouring pad again just to be sure all grease was gone, rinsed three times, and let dry.
Primer first
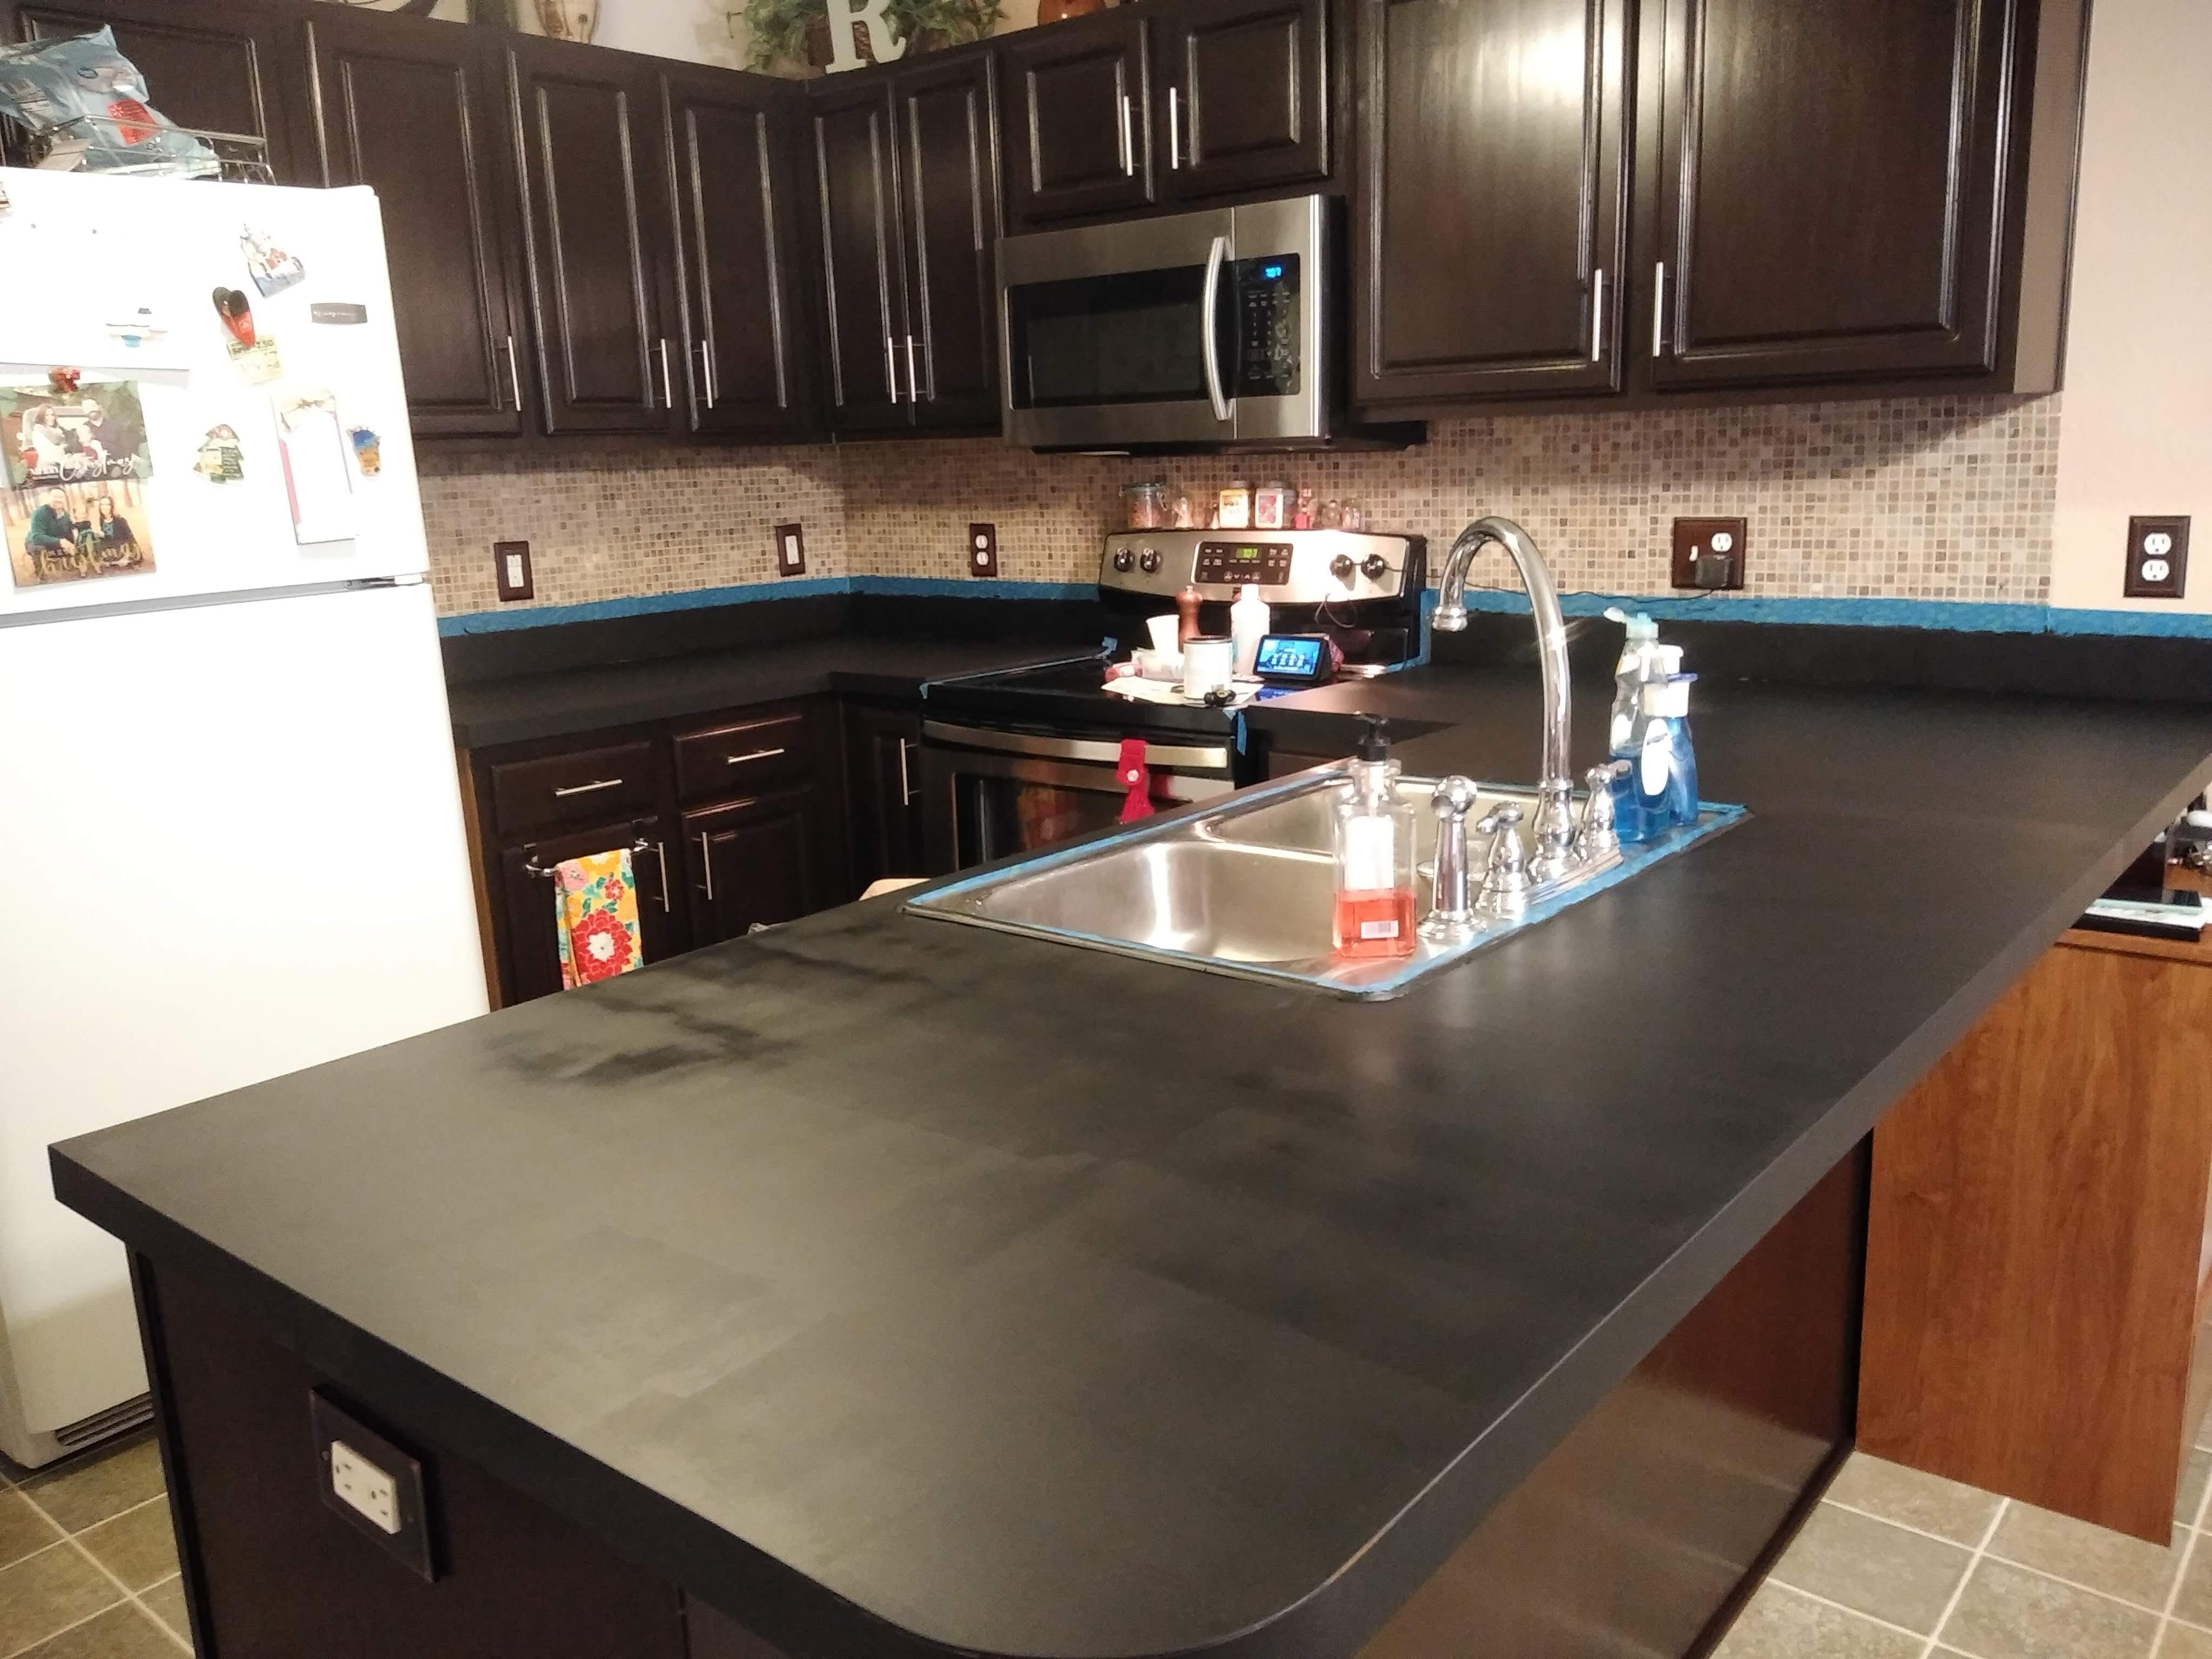
The next step was the primer step. I had bought a disposable roller tray, but you can use what you have and line it with foil for easier cleanup. This step is a bit nerve wracking. You’re supposed to take the included foam brush and brush the top of your backsplash and the area where the backsplash and counter meet. And then you use the roller to do 2 feet sections at a time. But you’re supposed to do it quickly. The primer is black and dries quickly, you’ll want to watch the video to get some tips on this one. Roll the black on, then go over it in smooth strokes to minimize lines. I ended up having to do one section over because it was not drying evenly. Again, watch the video before you attempt this step, then let it dry at least 8 hours. I let it dry overnight. (But don’t stress too much over this step as long as you cover everything because most of the black will be covered up later.)
Day Two
First thing that I did on day two was touch up the primer with a foam brush. There were a few spots that I missed. Then I ran my hand over the counter and lightly sanded with 600 grit sandpaper any rough spots. I then wiped the counter down with a paper towel, and got my paints out. I used reusable plastic containers from lunch meat as paint containers, and I lettered each container according to the letter on the paint. A, B, and C. I used foam plates as trays to wipe off excess paint. I rinsed the large sponge, and cut it into four pieces. Then I cut one smaller piece off of each of those pieces to use for smaller areas.
Watch the video again
I then watched the Giani video once again as a refresher before I started painting. Giani includes a piece of heavy paper the color of the primer for practice, but I didn’t use that. Instead of plastic gloves, which are in short supply because of this pesky Coronavirus, I used sandwich bags, which worked great to keep my hands clean. Just slip your hand in one and use to pick up the sponge and dip it in the paint. I started with color A, dipped my large sponge in, dipped the sponge onto the foam plate to lose some of the paint, and just started randomly sponging the paint onto the countertop. I did this in about two foot sections. Use the small piece of foam to dab the backsplash and any small areas. There is no right way or wrong way to do this, just use your creative juices and your imagination. Dab as much or as little as you want, but try to remember just how much you covered, because you’re going to want to do the same amount in each area so it will match at the seams.
Do the same thing with the other two colors
After doing color A, use color B and do the same thing. Dab anywhere you want, and as much as you want. You’re going to want to get a similar pattern and color combination all the way down your counter. Don’t worry, you can go back and do correcting later. The last color is C, do the same with it. I ended up having to go over everything with the black primer again, dabbing that around in places that were lighter than the last section.
If you use plastic containers to hold your paint, you can put the sponges into the container and put the lid on to keep it from drying out if you take a break between sections like I did. Then you can throw them away after you’re done. There was more than enough primer and paint for our countertop, which we estimated to be just over 35 square feet. This is all that I did on day two because time was limited, and I didn’t want to rush it and mess it up. I still have to do two coats of top coat, which I’ll do on day three.
Day Three
First thing that I did on the third day was to do the edges of the countertop that is by the stove. I’d thought that I’d just leave them black because I could not get to the entire edge because the stove was in the way. I would have moved the stove, but my kitchen is small and it would have been too hard to work around it. During the night I thought that maybe I could use Q-tips to get into the small area. And it did work! I just dabbed the colors on in order, and it looked much better than leaving it with the black primer.
Start with the backsplash
I lined the plastic roller tray with foil this time and poured about half of the High Gloss Topcoat (can number 3) into it, then put the clean roller onto the handle. First I used the foam brush and painted the top of the backsplash and the joint where the backsplash meets the counter for about two feet across. Then I dipped my roller into the tray and painted the backsplash itself. I painted longways, and then came back and rolled the roller up the backsplash in small sections all the way across. Watch out for drips. After that I painted across the back of the counter about two feet down. Then I got the roller wet again and rolled from the back to the front for the same distance. Then I went over it back to front again. You really need to watch Giani’s how to video to see what I mean. I did this for the entire counter and then waited four hours.
Wait four hours…
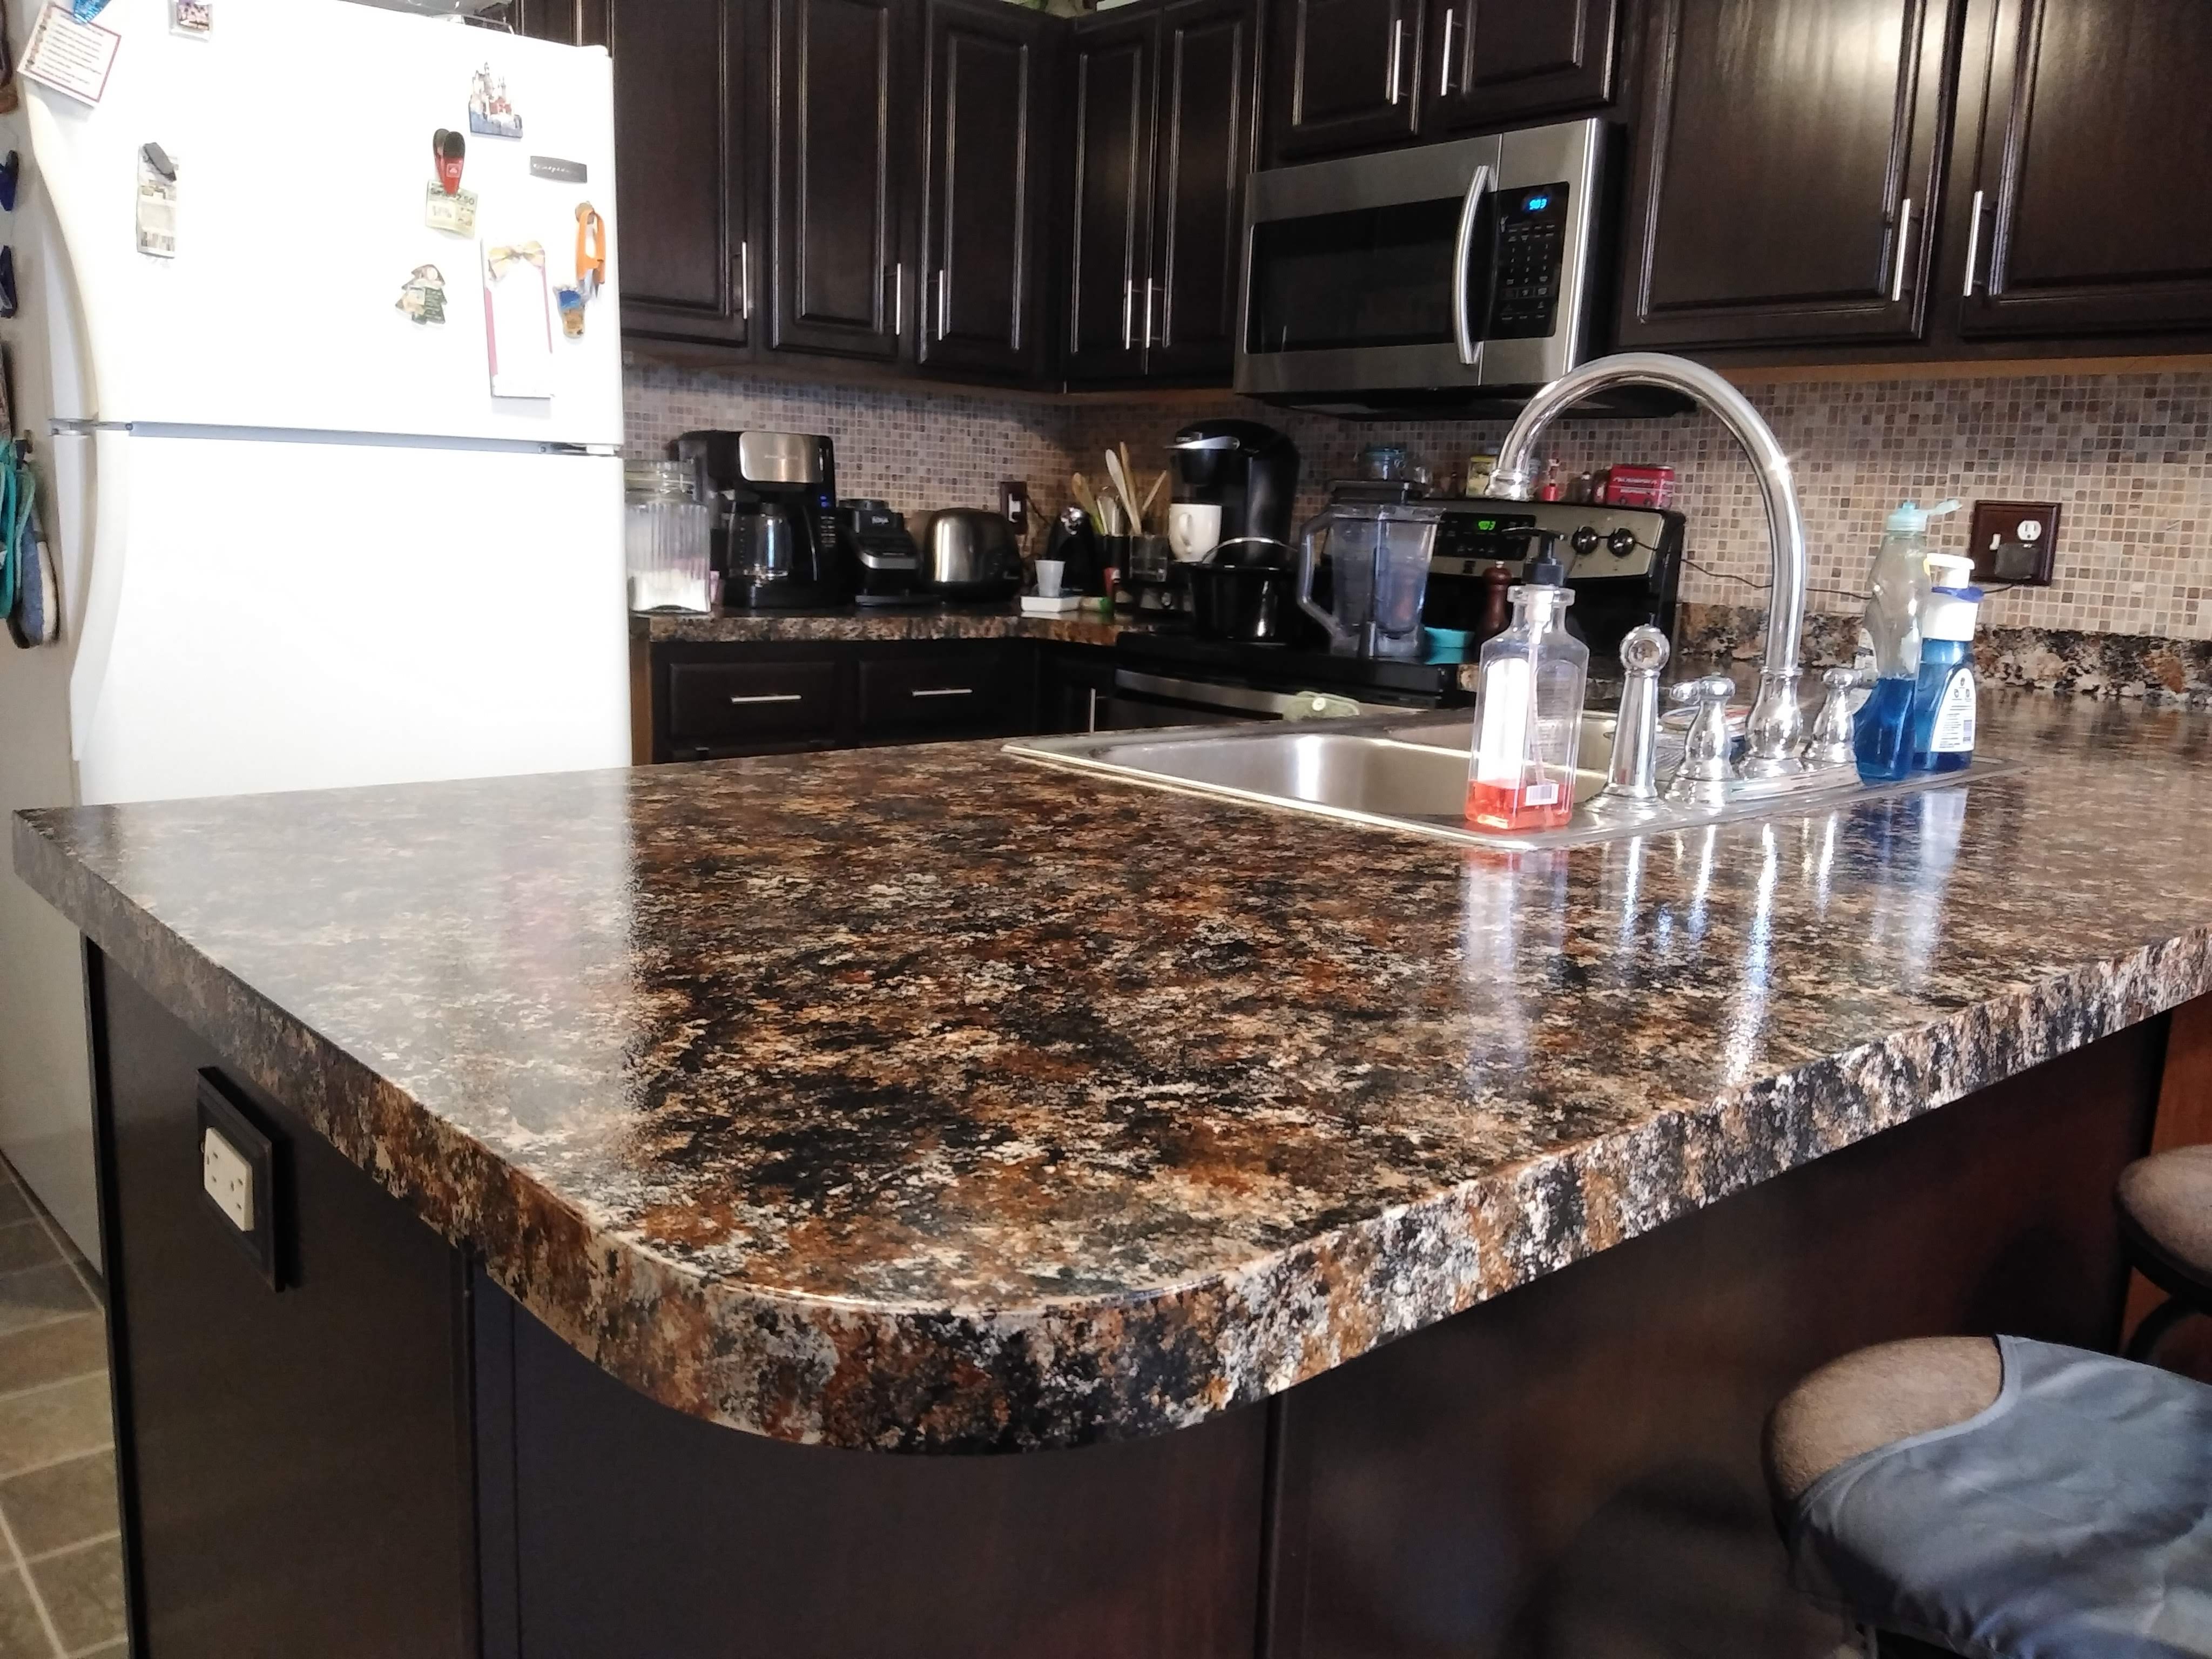
After the four hours were over, I lightly ran my hands over the countertop to feel for anything. There were some raised areas, so I took my 600 grit sandpaper and went over those areas. After that, I wiped the countertop down with a wet paper towel and let it dry thoroughly. After that I repeated the process again. Now, the top coat is easy to put on, but the results for me varied.
But wait…it’s blotchy
Parts of the countertop were shiny, and parts were dull, so the countertop to me looked pretty blotchy. I reached out to Giani and was told by Tim that “when the rare blotchiness occurs – it’s typically because the coating began to nap up a little, which creates microscopic peaks which deflect light in different angles – causing the final finish to feel a little prickly and appear uneven – The phenomena usually occurs when the coating is inadvertently thin in the area which causes it to begin to dry prematurely and consequently ‘nap up’ little peaks as the roller cover spins through it creating an ‘sss’ sound – The simple remedy is to allow the original coating to cure for a few days and then use a fine grit #600 sand paper – and lightly smooth down the areas which appear uneven- The topcoat finish doesn’t have to be removed – it just needs to be lightly smoothed down until it feels smooth in the affected areas – Which typically only takes a couple of minutes as it’s a thin surface – Once the area is smooth – then a damp cloth is used to wipe up any sanding dust and then it’s allowed to dry before re-topcoating .”
So, I decided to try one more coat of topcoating in a couple of days, sanding first and then applying the topcoat in a thicker coating.
Update
I received the can of topcoat from Giani. Giani has wonderful customer service, I can’t say that enough. And they are always available to help.
I did as instructed and sanded down the gloss just a bit with 600 grit sandpaper on the part of the countertop that had been blotchy. Then I opened the can of topcoat, and per Tim’s instructions, added two tablespoons of water to slow the drying time a bit, and stirred it gently. I put half the can into a foil lined paint tray then made sure that I had a good amount of the topcoat on the roller. My countertop is oddly shaped so I couldn’t roll it in the direction that would have been easier for me, but since the topcoat had the water in it, it was a bit more forgiving.
I did one coat and let it dry for four hours. It looked better, but I decided to do just one additional coat to it. I sanded slightly again and ran my hands over it to see if there was any spot that needed sanded down a bit more. Then I did one last coat. After it dried, it looked so much better than it had before.
Can you see the shine in the picture above? I won’t be able to use the counter for another ten days, but I think that it was all worth it. If you have an old countertop that has seen better days, I’d say to give this a try. Consider it your own personal artwork, and enjoy the project! I don’t think that you can do it wrong if you follow the steps. The hardest part for me was the topcoat, so take your time and don’t rush that part. And make sure that you have enough glossy topcoat on your roller when you do it.
What’s next?
The next project that I’m going to do is to paint that white refrigerator stainless steel with Giani’s Liquid Stainless Steel Fridge Kit, so stay tuned for that!
I hope that all of my readers are doing well in all the craziness of the Coronavirus. I cannot wait to be able to travel again. We have two cruises schedule from November through March, keep your fingers crossed for us.